Hanging With the Highflyers
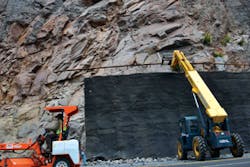
Although a number of contractors performed the installation of the wire mesh, Henke notes, “Most of the wire mesh used for slope protection was provided by Maccaferri.” And because the slopes were so high, “We hung most of it by helicopter,” he adds.
“There were two or three spotters on the ground communicating with the pilots by radio to direct them to the locations to lay the tether line,” he explains. After the helicopters laid down the mats, crews on the ground would go back in to install permanent anchors.
Henke says safety has to be another number one goal for any project on steep, sloped terrain. “For all of our projects, safety is a big issue. I strive for zero safety incidents,” he says. By “creating an awareness on a daily basis” with pre-activity safety meetings every morning, strict adherence to eyewear, hearing protection, and headgear, and other safety measures, says Henke, he met a goal of zero injuries for the entire project. “All of the contractors were highly motivated and hanging the netting by hand.”
However, slope washout repair does not always go as planned. Henke says one of the biggest challenges on the Highway 12 stabilization project was the fact that nature doesn’t take breaks. As the project progressed, a storm arose, dousing the project area with 2 inches of rainfall in less than an hour, causing a landslide that washed out a section of the nearly mile-high roadway and requiring an emergency repair.
“I went up and called a contractor on the phone and told him he had 30 days to repair the road,” says Henke, including stabilizing the slope and installing a drainage system to make sure the incident would not be repeated.
The $2.2 million emergency washout repair required treating the area to ensure adequate drainage in the future. The solution was a soil nail wall backed by TenCate’s Mirafi drain. Contractors installed the Mirafi drain on top of the natural soil to create an internal drain behind the planned nail wall. They then built a 700-foot soil nail wall and used 20,000 cubic feet of dirt from existing fill to backfill the landslide area.
“With soil nails, the biggest issue is choosing the right length of nail for the soil conditions,” says Henke. “The length of soil nail is dictated by the soil type and the friction you can create.” Geotech specialists from WSDOT headquarters came out to do soil bore analysis to determine the soil’s inherent characteristics. This analysis indicated the need for soil nails ranging from 18–78 feet, depending on the location, to secure the soil nail wall against a subsurface comprising a variety of different types of rock. Henke explains: “Years ago when the road was built, they were just blasting the rock and laying the road, so the type of material is variable.”
After installing the soil nails and injecting the grout to hold them in place, technicians bolted the wall plates and tightened them to the rock bank with bolts 7 feet by 7 feet on center. With a rebar mat incorporated into the bank structure and the bolt plates fastened down to 100,000 psi against the rock bank, says Henke, the installation holds together as a single unit.
With a spray of shotcrete with “aggregate the size of pea gravel” and coat of naturalistic paint to match the original rock face colors, says Henke, the site of the emergency repair approximates the natural landscape in appearance, and the emergency project was carried out within WSDOT’s 30-day deadline.


