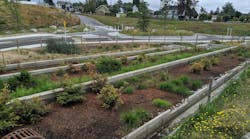
Managing Activities vs. Reacting to Impacts
Under the Clean Water Act, storm water and erosion control professionals are mandated to minimize the environmental impacts of their construction projects. It takes effort and commitment, but the result of managing grading and stabilization activities with the contractor—rather than reacting to impacts—is cost savings for the owner and the contractor.
Site Management Checklist
Make a commitment from the beginning, and know the consequences and potential costs of noncompliance. Use the resources available to develop a layered system of best management practices (BMPs). Think not of isolated, stand-alone BMPs, but rather a system of solutions in action.
A project that is managed actively to address environmental impacts is a cleaner, more organized and finished project. Anticipate the worst. Be apprehensive and concerned that efforts may fail.
It is advisable to approach the work using the following outline:
- Evaluate the stage of the work with the consideration of how measures will perform during a three-day continual rain event.
- Control and isolate live water through the work zone.
- Install and maintain perimeter controls.
- Install BMPs to intercept, control and stabilize runoff at the top limits of impact.
- Stabilize disturbed slopes.
- Line/reinforce drainage contours.
- Maintain existing BMP measures.
- Check fueling and work staging areas—underestimated danger areas for environmental impacts.
- Check turbidity monitoring results to evaluate the effectiveness of systems.
- Anticipate the next stage of work. Some measures may be removed and reinstalled daily. Have a “toolbox” ready (see sidebar).
Onsite Toolbox
- Straw bales (for mulching small disturbed areas; also good for forming conctete washout basins under visqueen)
- Reinforced visqueen (for covering disturbed slopes, stockpiles and channel lining)
- Sand bags (for checks and basins)
- Silt bags (for pumping and dewatering)
- Silt fence
- Wattles
- 50-lb bag of temporary seed and hand seed dispenser
- 100 ft of 6-in. flexible drain pipe (for slope drains)
- Straw matting (S75BN or equal for ditch lining and slopes above drainages)
- Water and temperature gauges.
Clearing & Grubbing
Advocate stage clearing and grubbing, and use clearing methods that leave the original ground mat to be removed with the next stages of grading. Grub out stumps, but salvage the original ground mat and salvage for slope stabilization. Brush barriers for perimeter control are an effective barrier for runoff and an alternative to burning or chipping; they can be left in place as habitat.Control Live Water
Do not contaminate clean water with work zone sediment. Take care of live water through the work zone as soon as possible. This is achieved via an isolate-divert-control process. Use temporary pipe underground and open-lined channels that are not contaminated by other work impacts.Perimeter Controls
Utilize debris from clearing on the outer limits in brush barriers with a silt fabric fence. Install silt fence, wattles, benches or berms. For winter work, use snow berming around stockpiles and new slopes as a barrier to control spring melt.Slope Stabilization
Leave the original ground mat in, and salvage for topsoil or vegimats when it has to be removed. On high slopes, install horizontal benches to intercept surface flows and control runoff to slope drains and basins. Tip the outside edge of slopes and benches in to avoid slope washouts.Apply temporary seed and mulch as soon as possible. Finish grade, topsoil, seed and mat with a light woven straw matting. Many types of hydromulch are available to stabilize disturbed, dormant slopes until the vegetation layer comes in.
As soon as possible, seed areas that are topsoiled and track-walked. If unable to move in the hydroseeder for permanent seeding, place a temporary seed on the disturbed slopes using annual rye or another approved mix. Seed is cheap. For smaller sites on drainages, cover unfinished temporary slopes with reinforced visqueen. When the vegetation layer is coming in, you are home free.
Drainage Contours
Reinforce drainage contours in the work zone with a geotextile fabric, straw matting or visqueen lining. Reinforce completed ditch runs with straw matting or rock lining to avoid scouring until seed cover is achieved.Fueling & Work Staging Areas
Determine how fuel “spots” will be disposed of. Address fueling, oil storage and staging areas with the contractor, and get his or her commitment to monitor and maintain staging and mechanic work areas. Check the areas as part of the site’s weekly Storm Water Pollution Prevention Plan, and report any noncompliance.Site Monitoring
The new Construction General Permit requires industry professionals to self-monitor work impacts. Get a turbidity meter for project use, and on larger and environmentally sensitive projects, hire an independent company or nonprofit environmental group to perform project monitoring. Involve permitting agencies in project construction with stage site reviews, and invite participation from advocacy groups.Forethought
Conduct a pre-disturbance site review with the contractor and agree to a plan to minimize impacts. Identify drainage corridors and sensitive corridors. Develop a plan for diversions for culvert installations, access, clearing and stabilization measures before work begins in the next area, and control the live water. Order materials and have the aforementioned toolbox full and ready to go.
Download: Here

